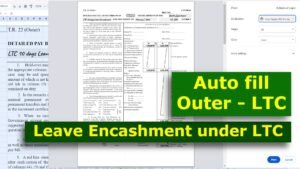
We use Google Sheets, Excel or similar way for daily office tasks, such as performing calculations and organizing data in table form. However, did you know that Google Sheets or Excel can also function similarly to Google Docs or Microsoft Word? Here, we discuss how these capabilities can be achieved by making specific edits or formatting changes to cells, rows, and columns in Sheets or Excel.
Decide how you want to work within the spreadsheet. Here, we’ll demonstrate a auto fill or generated the Form-style format commonly used in daily office tasks. This format requires minimal adjustments, such as updating names, employee IDs, dates, amounts, etc and a dedicated section in the main sheet or separate sheet, create a lists for all possible values for dependent fields.
A specific area or field is automatically populated based on the inputs already provided in a dedicated section, utilizing functions such as VLOOKUP.
Ready to practice? Try out this Google Sheets template—open it and make a copy to start editing: Autofill Form Spreadsheet
Dynamic Autofill Form Structure:
- The form in Google Sheets is structured within the range A1:S76 and is designed to fit across two pages when this range is selected for printing.
- The first page is designed within the range A1:S40, where formulas are used to auto-fill the form within minutes.
- The second page is organized within the range A46:S76.
- Rows A41:S45 are intentionally left blank to serve as a margin or printing space, ensuring a clear separation between the two pages.
- The range V3:V12 is for manual data entry by the user.
- The range U16:V19 collects information using the VLOOKUP formula, which takes the Employee ID from the manually entered data and retrieves corresponding details from the employee data range.
- Employee data is pulled into the form from the range V3:V12, X11:AA19 and U16:V19.
Formatting and Merging Steps for the Autofill Form
This dynamic method to auto fill forms ensures error-free and accurate work, making your tasks more efficient and streamlined within your work portal.
To set up and format the form correctly, follow these steps:
First Section: Range Management for Header and Form
The form is structured within the range A1:S76, with the first page spanning from A1:S40, containing all content including merged cells, highlighted ranges, and detailed sections.

- Highlight the range F1:L1 and merge the cells to create a header for “Non/Refund GP Fund” as shown in the image.
- Similarly, merge the range O1:R1 for “GPF No.” (contain formula =V19).
Merge the range B2:R2 to include the title or name of the form.
Second Section: Treasury Rule and DDO Code Section
- Merge B3:E3 for “[Treasury Rule 606 (“.
- Merge the range F3:J3 for “DDO-AA2546764”.
- In the next cell (K3), do not merge, but type the closing parenthesis “)” as shown.
- Merge K4:R4 for “Voucher No.”.

- Just below put date of bill generation.
- For further merging for formatting follow the structure in the provided image to merge the cells in specific areas for proper alignment and formatting:

Ensure all merged cells are center-aligned both horizontally and vertically for a clean and professional look. Apply borders around all the merged cells to make the table structure clear and easy to read.
Third Section: Header for Employee Details and GPF Account Information with Sanction Order

- Merge the range B11:C13 to create a single block for “Serial No.”.
- Merge the range D11:J13 to consolidate the block for “Name of Subscriber, Pay and No., and Date of Auction”.
- Merge the range K11:L13 for “GPF. Account Number”.
- Merge the range M11:P13 for “Advances/Withdrawals”.
- Merge the range Q11:R13 for “Acquittance”.

- Merge the range B14:C27 to display “Below Rs.” (contain formula =M22+1).
- Merge the range D14:J17 (contain formula =V17&”, “&V18&”, “&” emp-id-“&V16), D18:J20 (contain formula =”Sanctioned Vide Order No.”&V5&”/”&U9) and D21:J22 (contain formula =U6&”-“&V6) for Name/id, order no. and date respectively.
- Merge the range K14:L21 for “GPF no.” (contain formula =U19&” – “&V19) and just below K22:L24 for text “Total” and merge M22:P24 for amount (contain formula =N14).
- Merge the range M16:P21 for white space.
- Merge the range M14:M15 for the text “Rs.” and N14:P15 for “Amount” (contain formula =V4).
- Next merge the range D25:R25 to display the text “Net amount required for payment (in words)”
- In the last of this section merge range D26:D27 for the text “Rs.” and range E26:R27 for amount converted in the words (contain formula =IF(M22=””,””, SpellNumberINR(M22))).
Fourth Section: Specific Area for Signature of DDO and Treasury Officer

The fourth section need to adjust the cell range for text and in this section no any formula contain area. Simply adjust this as shown above and apply appropriate font styles (e.g., bold for labels) and borders for clarity and consistency.
The entire form is structured within the range A1:S76. The first four sections are carefully designed to fit seamlessly within the range A1:S40, creating a complete and well-organized first page. This ensures that all necessary information and formatting, including merged cells, highlighted ranges, and structured details, are cohesively presented on the first page.

The second page of the form is adjusted to utilize the range A46:S76. This layout ensures a clear distinction between the content of the first and second pages while maintaining a professional and structured design throughout the entire form.


The division of content across these ranges allows for efficient presentation and easy readability. The second page contains only text, with no formulas, ensuring that it remains simple and clear in its design.”
With a well-setup system in Google Sheets, you can easily auto-fill forms using just the employee ID, eliminating the need for manual data entry. This setup simplifies your daily routine, whether at the office or home, by automatically populating the form with relevant details.
Gone are the days of making carbon copies for duplicates. By utilizing functions and formatting in Google Sheets, you streamline the process, ensuring accuracy, efficiency, and saving time.
Handwritten Form vs. Auto-Generated Form in Google Sheets
Handwritten Form:
Time-consuming and prone to human error.
Requires physical copies for duplication, resulting in wasted paper and effort.
Limited scalability for handling large amounts of data.
Auto-Generated Form in Google Sheets:
Instant auto-filling based on employee ID, reducing manual work.
Eliminates the need for duplicate copies, as all data is stored digitally.
Scalable, efficient, and accessible across devices, improving workflow and saving time.
By automating the process with Google Sheets, the form generation becomes faster, more reliable, and eco-friendly.
If you have any questions, need assistance, or encounter challenges, feel free to share your concerns in the comments. The CountLen team is dedicated to providing quick and effective solutions. If you notice any inaccuracies or misleading information, please provide feedback—we’re here to support you!


